Showing posts with label life. Show all posts

Wednesday, June 4, 2014

Hand-crafted Gifts for a New Baby -Part 2

So.... on we go with gifts for a new baby. 

Now we come to what I have added to mom's mix of goodies. And baby goodies are just so darned hard to resist! So I've had projects stashed, for a while now, just waiting for the right child to come along.

I love to crochet. Mom taught me when I was about 9 years old. I haven't done much of it over the years until recently. But when mom died, I started crocheting like a crazy woman, and I haven't stopped since. When I'm not feeling terribly creative, or I want something easy while I sit and watch tv and talk, or when I wake up in the morning with my coffee, crochet is it for me. 

Before Zoe was even born, I'd spotted these booties. I just knew that someday I'd make them. They were done before she was even born! Of course, I rarely follow a pattern exactly. I made Zoe's booties two rows shorter, and in cotton rather than the wool. Zoe lives in Hawaii... 


Then I got a bee up my butt and decided this Hawaii-born child needed an old-fashioned baby bonnet! In cotton, of course. So I found a cute free pattern on Ravelry.com, made some adjustments, and voila... 


The next stop on gifts for a new baby will be..... Now you didn't really think I'd tell you... Did you? Stay tuned!

Wednesday, May 28, 2014

Hand-crafted Gifts for a New Baby - Part 1

New babies. Crafters just love new babies, especially if they are in our own family! So many goodies to create for this new bundle of joy. And I now find myself in just this wonderful circumstance.


Our niece, the oldest in her generation, has just had a wonderful baby girl. Many of us were expecting a boy, so we're just thrilled! Our niece Cecily is the oldest child of the oldest child, and Cecily is also the oldest in her generation. And she has just given birth to the cutest baby girl, Zoe, who is now also the oldest in her generation. Did you follow all those oldests? 

And of course, as a tried and tried true crafter and artist, dedicated to keeping the family crafts my mom taught me alive, I jumped on this happy circumstance! This baby just had to have the things my mom made for my boys, and more.

But I'm crossing family and cultural lines here. I was born and raised in the east coast. But my hubby's family is a Hawaii born and raised Chinese family. I'm melding the two. And after all, our country is a wonderful melting pot. So, I'm happily and creatively melting!


My mom made hundreds of Amish baby balls over the decades. Yes decades! They were always made from scraps of leftover cotton fabrics. My adult sons still have the ones she made for them, and they definitely treasure them. I knew I just couldn't let this tradition go with her passing. But the Amish baby ball I made for our niece's baby was done entirely in Hawaiian fabrics. Somehow, doing that baby ball in traditional quilter's cottons just seemed all wrong! 

And then there were the receiving blankets, made from cotton flannel, with a hand-embroidered blanket stitch all around the edge. I still have the ones mom made for me to use with my boys.. And now our niece has ones I made for her. And I must admit, they look so cute with baby Zoe in them! 


Stay tuned for the next part of this article. Our Zoe girl has me so excited to create girly things!

Wednesday, August 7, 2013

Remembering Mom Through Cards

 
When my Mom passed away earlier this year, I knew that eventually all of the handcrafted cards I'd made for her over the years would come back to me. So I thought I would share a few of them with you.
 
I can honestly say, that my techniques really have improved over the last few years. At least I think so! And I also have to say that watching craft technique webisodes on Paperwishes.com has been a big part of my learning process. If you haven't checked out any of these videos yet, they are simply wonderful. Just don't watch them late at night, or your creative brain will be flooded with so many ideas you won't be sleeping any time soon.... Just believe me on that one!


Black glitter glue really
does the trick here
on this old-timey card.


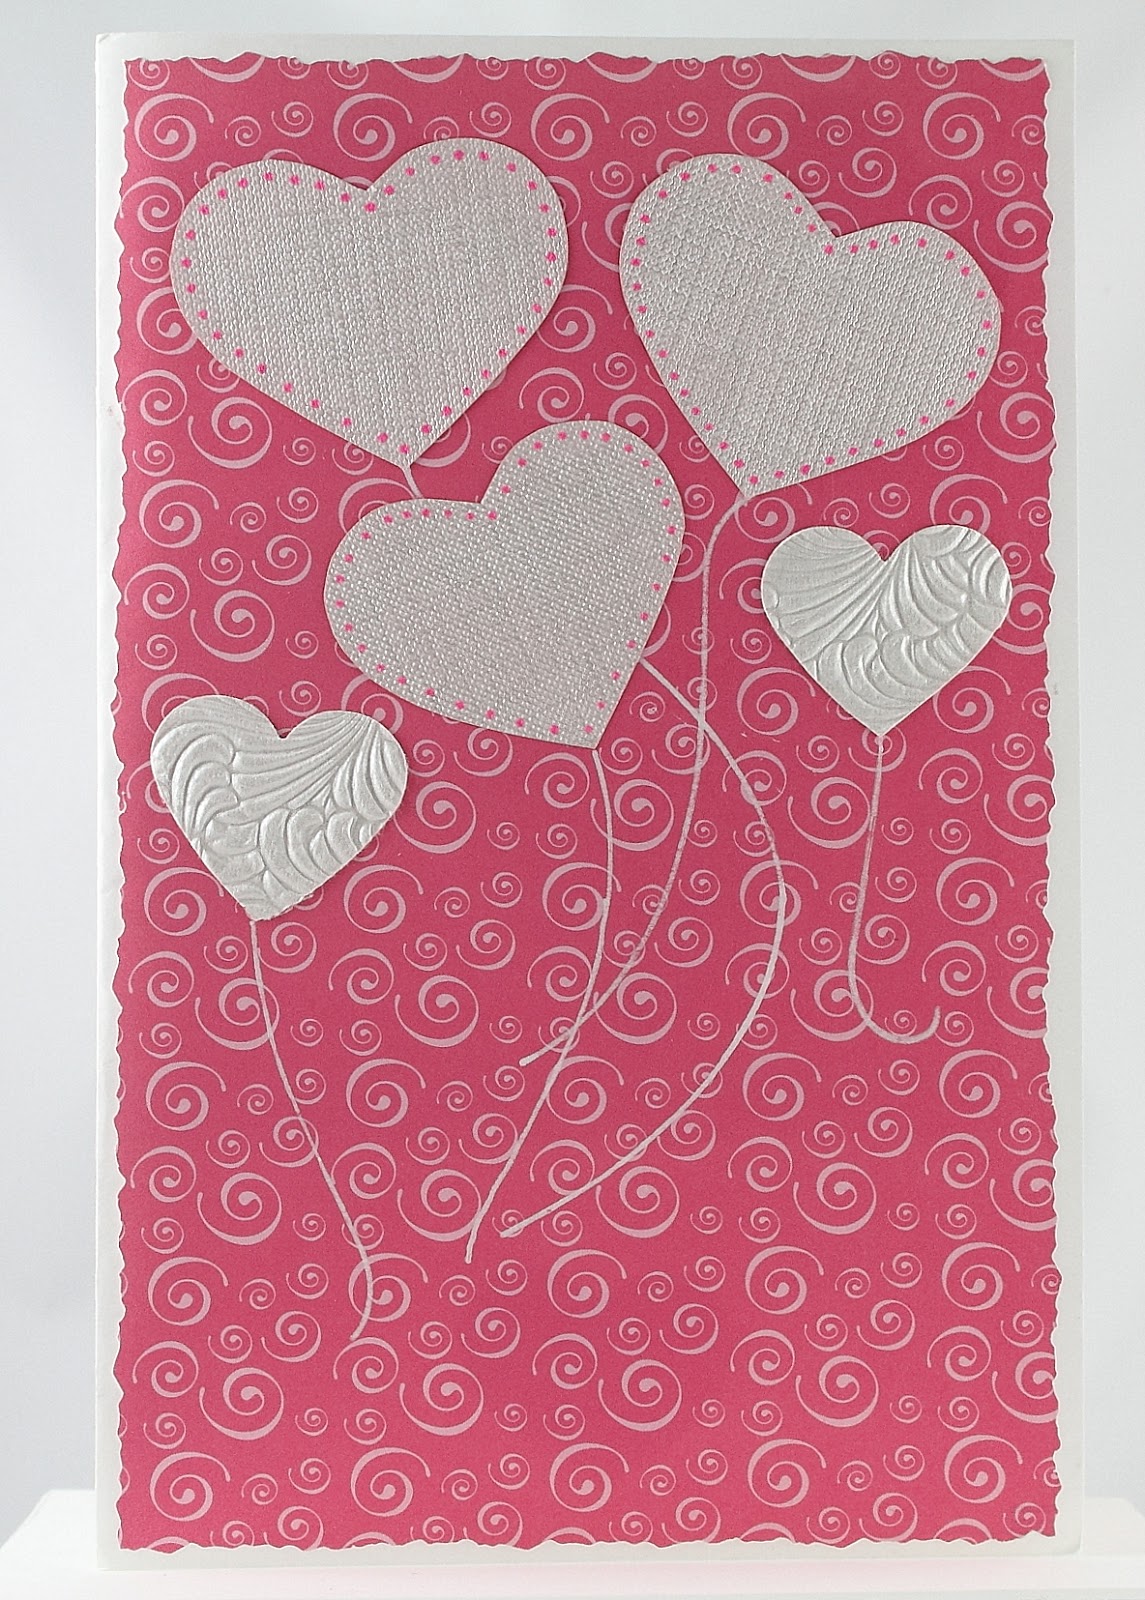
I like turning hearts
into ballooons


Mom was an avid quilter, so I simply had to do a Sunbonnet Sue card for her. The first quilt she ever made me was a Sunbonnet Sue pattern. I was 6 years old, and I still have it. The technique I used for the front of the card is called Iris Folding. Directions and templates are easy to find on internet, but I made my own template for this project. 


At one point in time I got heavily into paper quilling. I saw a pattern similar to this one in a book, I think, and had to try it out on a card.


And this fab paper is Color Me Resist paper available at Paperwishes.com. There are just scads of these papers available now, with the raised embossed portion in black, silver, gold, copper..... Big 12 x 12 inch sheets, card toppers, post cards... You can color on them with pastels, pencils, inks, paint.... This card was done with dye inks, carefully blending the colors. This whole line of Color Me Resist papers are just a ton of fun to play with! I was terrible at coloring as a child, so I'm going through that phase of my life as an adult!


Tuesday, April 3, 2012

Thinking of You

Inevitably there are occasions throughout the year when I find myself making cards for unexpected events.  Unfortunately, these are not usually happy events.  They are what I like to call 'Thinking of You' events.  I'm not one for mushy sentiments, just some good old creativity in the form of an art card and a simple thought.  I like to let my art do the speaking.

A friend of mine recently shared some disheartening news about her husband's health, and it was just the time for one of these cards. 


I started this project with another pattern of the Color Me Resist paper from Paper Wishes ; they have so many beautiful options now.  And since acquiring a whole lot of Spectrum Noir markers, also available from Paper Wishes , I was anxious to try them out on this paper and see if they were as magical as they seemed they might be.  They worked like a charm!  The markers blend so beautifully, and there are sets of colors in various shades and hues of the same color that really make blending a cinch!  You need to work with the Spectrum Noir markers while they are still wet, otherwise they don't blend the same way, which is why the outline of the leaves is a bit pronounced and unblended.  Of course, my friend didn't know that until now!

To finish off the front I added some simple ribbon stripes, the tag accented with dots of my favorite glaze markers and a bow.


On the inside I used peachy vellum, with more simple ribbon stripes.  I printed the tag from an art program of mine and used a Martha Stewart border punch to create its decorative edge, and a few more dots with my favorite glaze markers.  And by now you probably know that the butterfly is also a Martha Stewart punch accented with her glitter.  Good guess!

And voila!  Off in the mail it went.

Thursday, March 15, 2012

The Making of an Art Card - Part 1

I love playing with paper, and it's really all my friend Christy's fault. She is the one that had a paper stash and then showed me what you could do with all of those lovely bits of paper. And I was instantly addicted.

I had already been doing homemade photo Christmas cards, but this was a whole new world. It's kind of like creating a quilt, which my mom happens to be most excellent at doing. I layer techiques and colors and bits and pieces, and eventually the piece tells me it's done. It just looks complete all of a sudden.

Sooo, I am going to try and chronicle my art card escapades for you, as much as photographically possible.  Here is one I am working on right now.


The paper I used here is called Color Me Resist Paper and it is available at www.paperwishes.com.  Now this paper is really fun to work with.  The design is raised and resists all water-based inks. You can ink it and then you gently wipe any excess off the raised white part. You can color it with markers or pencils. And there are a multitude of other products out there I'd like to try, but I don't own them yet!

Here is what the paper looks like close-up as you get started.


And then I thought the front would need something more... And bless her soul, good old Martha Stewart has this fabulous butterfly punch that I have used and loved many times since I bought it. So I punched three butterflies out of heavy white paper and used Martha's glitter glue and glitter to jazz up the butterflies.
And here's the butterfly.


I'm working on the inside of the card now, and I will show you all how it finishes up, very soon. I have a deadline!

I also have more cards to show you, some complete, some still in process. Until then, happy crafting!

Saturday, January 14, 2012

Art on the Cheap


When it's time to take down the Christmas decorations, the house always seems so blah and bland to me, especially with our long wet, gray winters here in the Pacific Northwest. So, I borrowed a theme from my Chinese hubby. When Christmas comes down, Chinese New Year decorations go up. Lots of red, black and gold come out. Years ago I bought a First Day of Issue stamp for Chinese New Year that was beautifully mounted and displayed, and it really needed some mates. Time for 'Design on a Dime'!

I quickly made the above two pictures to go with my other one. I already had the Chinese New Year stamps in the left pic. So I dug through my stash of art paper and found what I wanted to mount the stamps onto. A little bit of glue, some sparkle dots in the corner, and an inexpensive frame I already had (I buy frames on sale and just save them), and voila! Pic number one is done.


For the second pic, I dug through my really special papers from a bff who shares my 'paper passion' and I found the beautiful flying cranes on a gold background.  A little bit more paper for mounting, some red strips to frame the cranes, and sparkle dots in the corner, and pic number 2 is ready to pop into a frame.

And there you have it, easy art from my stash and no extra money spent!

Thursday, October 6, 2011

My Pie Theory of People

I think people are like pies. Are you conjuring up images of luscious cherry pie in your mind? Really?


Well, that's not exactly what I had in mind! I was thinking of a pie that looks more like this:


And this really does explain an awful lot about the many differences between folks. Because you just can't have more than 100%. That's all there is and there is no more. Just 100% to go all the way around into the many facets of who we are as individuals.

So it just stands to reason that if a person is really good at one thing, that takes up a lot of their 100%, which leaves less for everything else. Make any sense to you? It does to me.

Take engineers for example. These guys are blessed with brains and book learning. They eat calculus as an appetizer. And they design and build amazing things, from tiny little devices that hold and play an amazing amount of music to buildings and bridges and roads. They also tend (note I said tend) to be dull as dishwater socially. But all those social grace percentages got shifted over to their thinking and learning percentages.

Take artists as another example. We are blessed with creativity. But that high percentage of artistic abilities that we have leaves us a wee bit short in other areas. Know what I mean?

But hey, the world needs both engineers and artisits. And all sorts of other types as well. We just all have different strengths and weaknesses, and that's OK. In fact, as someone once said, "It's a good thing!"

Tuesday, May 10, 2011

Huge Bouquet for Mother's Day !


I really must brag about my wonderful men and the spectacular bouquet of long-stemmed roses and lilies they gave me on Mother's Day, after a really nice dinner out. There were 20 (yes, twenty) roses with stems 30 inches long!  And 8 lilies, some white and some tiger-type that matched the roses beautifully!

I was awestruck; I was dumbstruck; I was truly speechless.  I jiggled all over like a small child on Christmas morning!

Saturday, October 10, 2009

It hapens every August

Well..... this is the entry I wanted to write in late August. And, actually, in a way, I did write it. In my head. It just never journeyed from my head onto paper, as we used to say. August here in the Portland, Oregon area is almost always a gorgeous month. It's warm, even hot, but the nights are getting just a bit cooler. And then one beautiful morning, you walk outside into the sunshine and blue skies and late summer flowers, and there is a definite feel of 'autumn in the air'. That crisp edge to the air that signals that summer is coming to an end. And here in the Pacific NW that means 'grab the sun while you can'! In the eastern part of our country, fall is a glorious and beautiful season. The colors are spectacular, and the weather is sunny and dry, although cool. And this year we have been treated to more than our usual share of that gorgeous weather, and I for one have really been loving it!

Back in the Saddle Again

Literally, that is. And let me tell you how my thighs felt about that after a 30 year hiatus! Definitely not happy, shall we say? For about 10 days or so.....And on I rode, and I'm still riding twice a week right now. And now my thighs don't hurt anymore and I can use them again! And my arm muscles have healed after a 'tug of war' session with a handsome young 4 year old named Houdini, who is green broke (or early into elementary school for you non-horse folks). He's going to be a good boy, eventually. And now that I'm riding again, I'd like to do it regularly. It's a part of my life from the 'before time'. For many years when we lived in Pennsylvania, horses were my passion, a very serious passion. And I even did some riding up at H.P.A. in Kamuela, on the big island of Hawaii, during my last two years of high school. But when I went to college, the riding stopped. And then recently, fortune and my husband intervened to get me back riding again. Bless his ever-lovin' soul! However, at the end of October, Houdini is moving to his permanent home in Jewel, Oregon, which is about an hour from here, toward the coast. So, I obviously need another plan, if I'm going to keep riding on a regular basis. One that will actually fit into my already busy life. Stay tuned!

Monday, August 31, 2009

When the men are away, the gal does play!

I've been having the most glorious summer vacation since August 20th. All of my men have been in Hawaii, and I have been deliciously alone, alone, alone! Except for our 3 cats and 2 dogs.
This year I've been in the mood for landscaping, not art. I'm in one of my rejuvenation periods, which means no art, because my artistic side is tired. And the yard was really primed for me to get in and finish off some projects. Cody and his friends have been yearning for money all summer, so I put them to work in the yard, doing all of my tendon-killing projects that would take me years to do, and only takes them hours to do. So, I was able to spray all of the new flagstone that we laid in my favorite new spot in the yard, with a color enhancer/sealant, and it really looks great now. Then I went on to our little Japanse garden. First I dug up and relocated two azaleas; one was doing poorly and the other was being buried underneath some overzealous groundcover. Then I had the big, strong 18 year old next door move a couple of potted plants for me. Next on my list was acquiring a quantity of polished black Mexican rock for our little Japanese garden in the side-yard. I talked a buddy into going with me for that one. And we oohed and aahed at all of the gorgeous rock before we loaded up with 250 pounds of polished black Mexican rock, which now looks spectacular in our Japanese garden, and should save me from doing a lot of weeding in that area.
This past weekend was Airshow weekend here, and although the weather on Friday and Saturday was less than ideal, yesterday the skies cleared up and they had nothing but blue skies and perfect conditions. So I was out in our cul-de-sac with my cameara, and here are the shots I got.

Wednesday, July 29, 2009

It's ridiculously hot in the Pacific Northwest

OK, so the temperature was down to 104 degrees in my backyard today, in the shade, under the filbert tree, near our little pond and waterfall. (My Mom swears that everything important happens under 'the famous filbert tree', and she isn't too far off the mark.) Now, if you really stop and think about it, that's an absolutely ridiculous statement for someone to make if they live here in the beautiful Pacific NW. We haven't had a heatwave like this since before my oldest son, Dan, was born, and he's 25 now and all grown up! Crazy! So, I'm pulling out all of my salad recipes, and always on the lookout for more. This night, I wanted to make a salad with beef, maybe Thai-oriented. I searched the internet, and got some ideas, but not a solid recipe that really spoke to me. So, I went shopping, and winged it. Now, I'm really liking the way this salad turned out, so I thought I would share. It's healthy, has interesting flavor combos going on, and even satisfies the meat eaters out there. I'm not going to get exact on proportions here, because I really just did what looked right for the folks I was feeding.

Andi's Steak Salad

1/4 lb beef top loin steak per person

grill seasoning

1 bag of iceburg lettuce mix with carrots and red cabbage

some fresh spinach, thinly slice

fresh cilantro, chopped (unless you hate it, and then use flat-leaf parsley)

bell pepper, preferably red or yellow, chopped

cucumber, peeled and chopped

bean sprouts

salad dressings of your choice

Assemble the greens in a big bowl as follows. First, put a generous amount of iceberg lettuce mix in the salad bowl. Then add the spinach, cilantro or flat-leaf parsely, bell pepper, cucumber, and bean sprouts. Mix well. Cover and refrigerate until your're ready to serve.

The steak can be bbq'd, broiled, or pan-fried. Cook it to about medium rare and season with grill seasoning. Let the steak cool and rest. You don't want to slice it until it's close to room temp or the juices will all run out. Slice the steak very thinly on a platter of its own.

Each person can assemble their own salad: first greens, then meat, then dressing. I served this salad with some good crusty Italian bread.